Robotics Project With Kyle Sousa
Reflection
1. To attach the sensor onto the robot and program it to stop before hitting an obstacle.
2. We needed to know how to program a robot and the sensor.
3. Step 1: We acquired a sensor for the robot we had build for the previous project.
Step 2: We attached the sensor to the robot by making a bracket on the front of the robot to attach the sensor to.
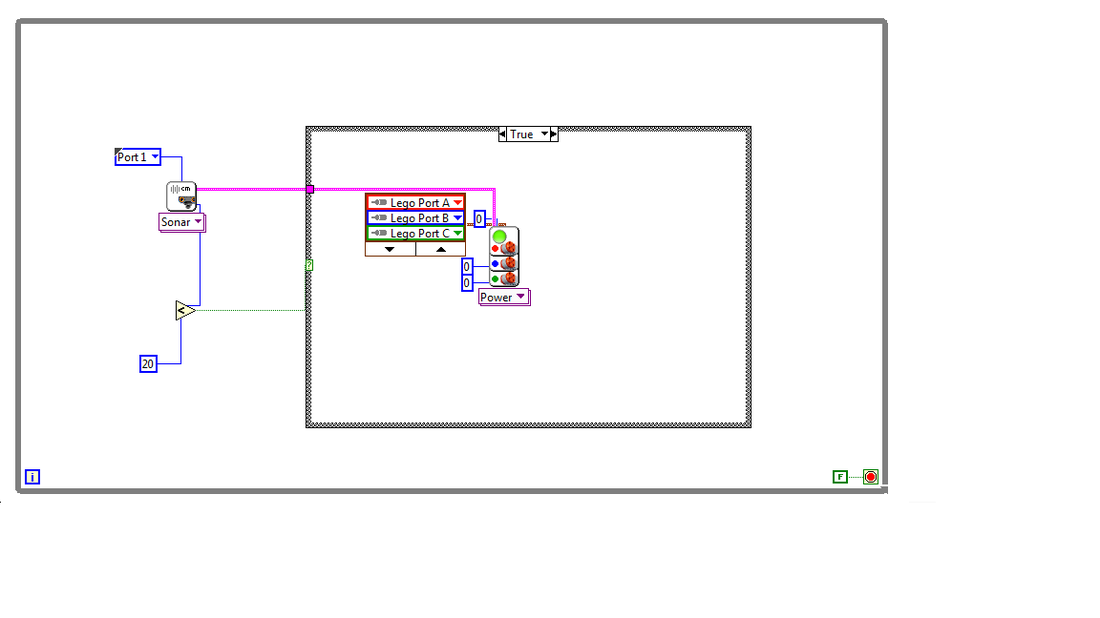
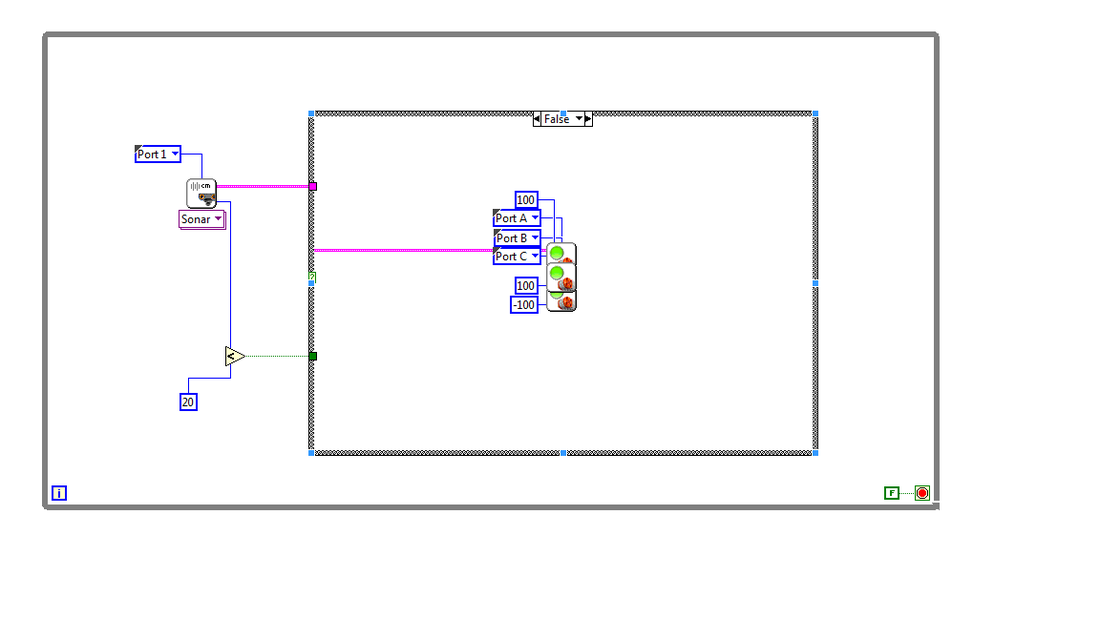
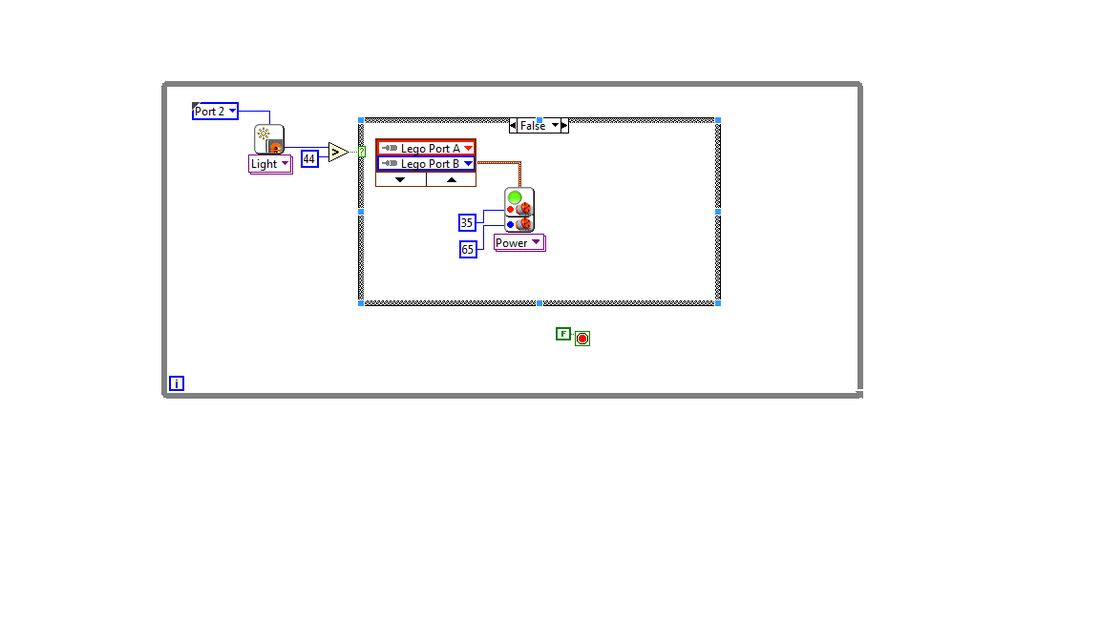
Step 3: We programmed the robot to stop when there was an object in front of the sensor.
4. The final product was a robot that would stop when an object was in front of it and continue to move when the object was removed.
5. Mr Croke helped us with errors that occurred when we needed help like when we needed help with the programming. People liked the design of our robot.
6. We learned a lot on how to program the robot and how to work around the limitations of our design.
7. If we had to do the project again, we would try to make the robot smaller and more compacted. I would also work on doing the programming faster.
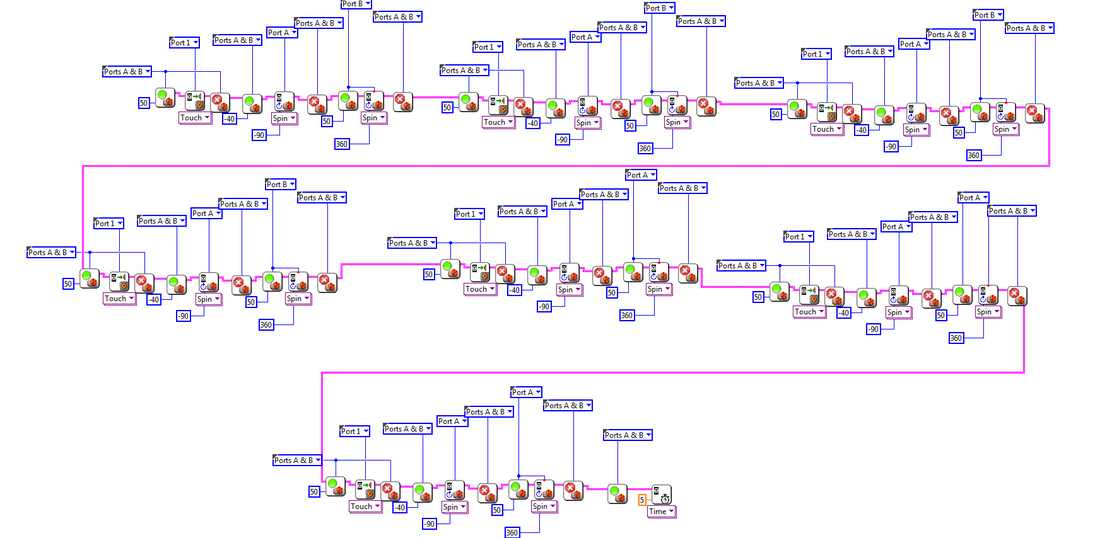
Line Follower Project
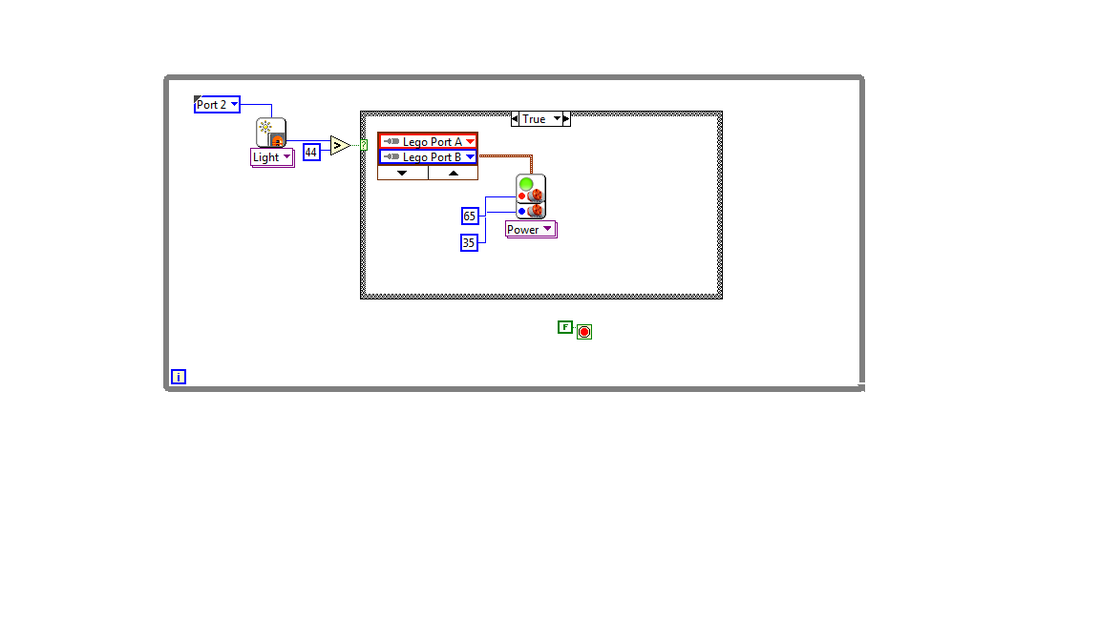
Light Follower Project: What we started with/What worked
Problem Solving
Throughout the project, we had a few problems here and there that we solved. This included problems with stability, speed, and turning problems. We solved these problems by changing the design of the robots such as removing the back motor. We also had to change our programming to make the robot work as efficient as possible. The final change was to add a tire up front Which helped with the stability, speed, and turning.
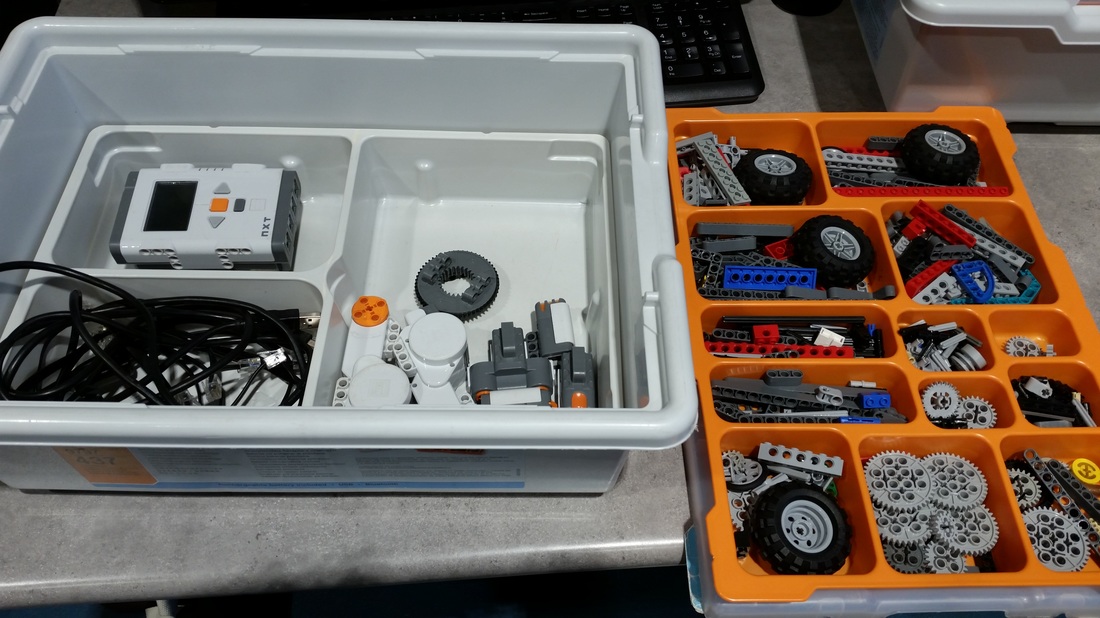
11/12 Kit
Robot Challenge 1

Maze #2